First, let me just say that I love, love, love pincushions! There must be ten hanging around my sewing room. Magnetic pincushions (which aren’t much to look at but get the job done), pincushions that look like chairs, teapots and Christmas trees as well as a much beloved lady pincushion who was beheaded by my dog when he was a puppy. Some day I will remember to buy a new wooden ball for her head! So, when the fabulous Madam Samm announced a pincushion blog hop cheered by the lovely Kristen, I was in! (By the way, standing ovation thanks to these ladies for pulling everything together!)
I had a ton of ideas for this one but finally settled on a wrist pincushion. Back in my dressmaking days, I loved my little red plastic bracelet pincushion so I set off to make a new one with a bit more style. Even I have to admit that my old one was, well, ugly but very useful.
So, in more pictures than words, here’s what I did…
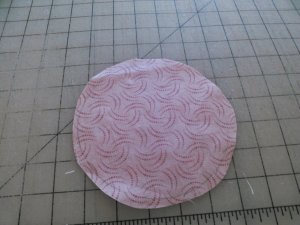
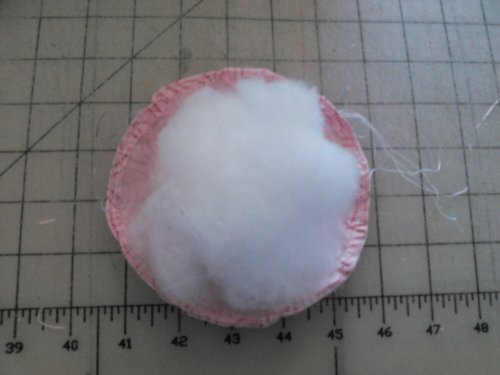
The first thing was to cut a circle and stay-stitch the edges a quarter inch from the sides.
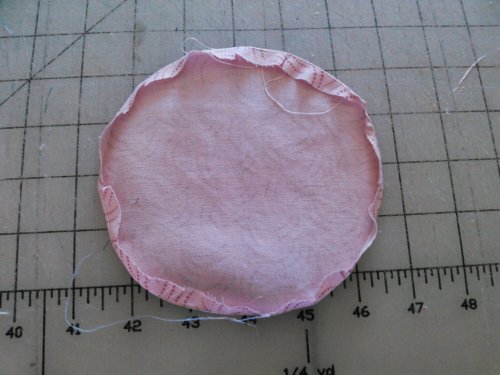
Then, I pressed along the stitching.
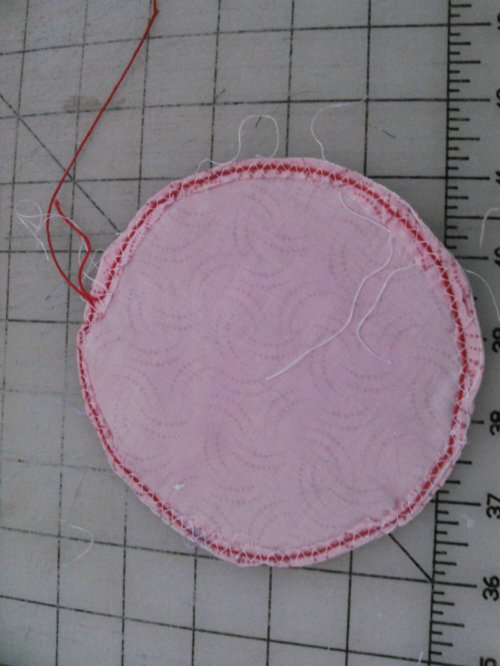
Zig-zagged over some narrow cotton yard (after breaking the first basting threads.)
Added a fistful of polyfil.
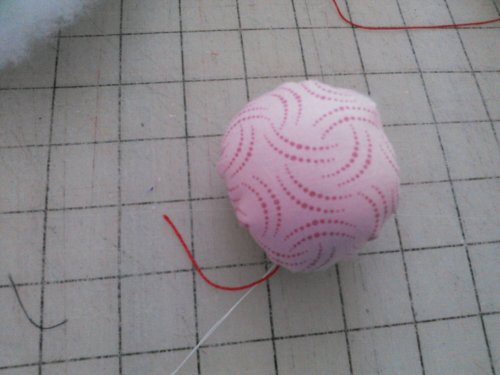
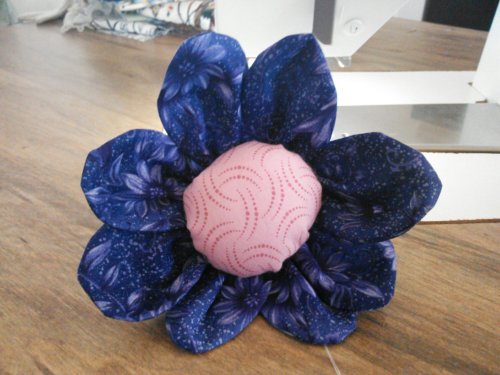
And pulled like crazy on the red yarn! (A word of advice, don’t pull as hard as I did…I broke the yarn!) Now, I had the center of my pin cushion and it needed…petals!
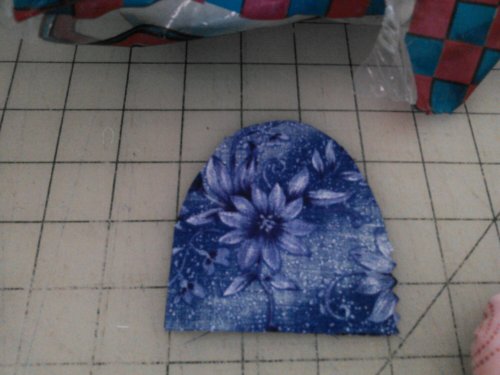
3.5″ strips made a great height for petals. I roughly cut the shape on two petals, sewed them right sides together and then turned and pressed them. I made a total of eight but it’s up to you…I even thought it would be fun to make two colors.
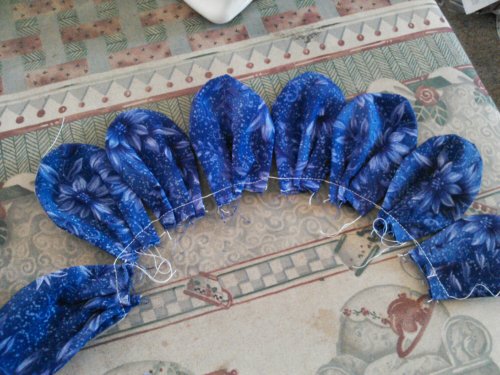
For depth, I folded a pleat in each petal and stitched the pleat in place. I chain-pieced them thinking I could just wrap them around the poof but ended up having to cut them apart.
Fuss, pin,fuss, pin, repeat until you like how your flower is looking. Then use a double-threaded needled to stitch your petals to the center. (A step I’d like to have skipped was the “go to post the photos and find out your phone deleted five photos”….sigh!)
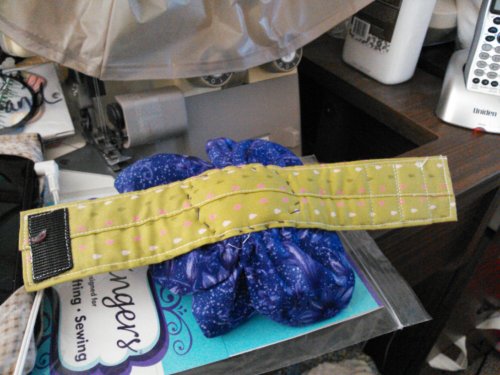
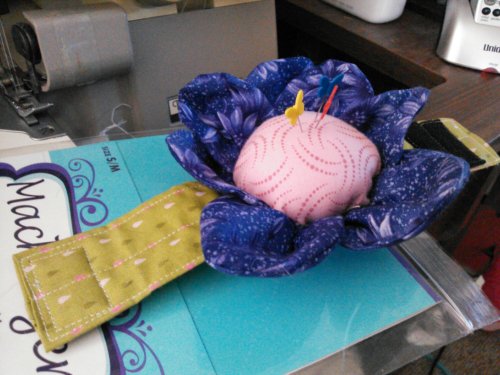
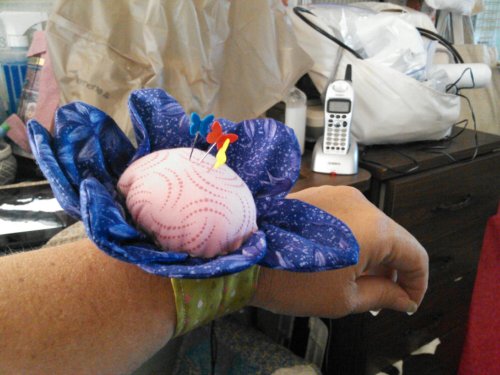
Make a wrist band by cutting a 4″ strip of fabric and a 1.5″ strip of batting a comfortable size for your wrist with a little extra to overlap. Fold down 1/4″ on all sides of the rectangle. Center the batting in the rectangle and fold it closed. Top-stitch around all sides and down the middle. Add velcro closures (one on top side, one on the bottom – be sure to try on for size.) I doubled the amount of velcro on the “catching” side so that the band was adjustable. Handstitch the flower to the wristband and, voila…a wrist corsage pin cushion!
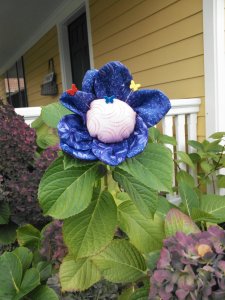
Here it is on my wrist.
If I make another one, I might try for a smaller starting circle (mine was about six inches across) and a narrower wrist band but I love my little pincushion and hope you do, too!
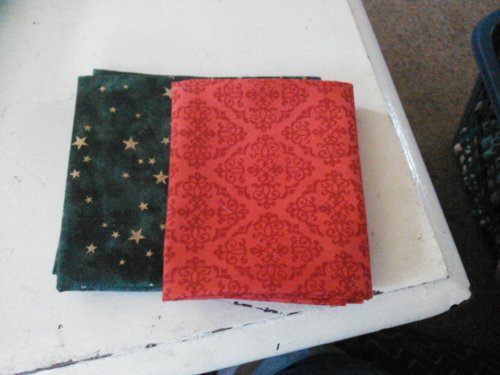
As for the giveaway, here are a pair of fat quarters to get you started on your own wrist pincushion or perhaps some Christmas sewing. Personally, I never have too many reds or greens, do you? I’ll be heading out of town on the 18th so I’ll wait until my return to draw a winner on October 3rd. In the meantime, watch out for lots of photos from Ireland and Scotland. Once again, I’m off adventuring with my mom and sister. So, if you’d like to be entered, leave me a comment telling me about a trip you loved or one you would love to take. And be sure to hop over and see these wonderful people who are also posting today!









I love your tutorial! Thank you. Your pincushion is adorable!!
That is one awesome wrist pincushion!! 🙂
I just took a wonderful trip to Germany with my husband and two boys…it was great because the kids are now in college and it was wonderful spending quality time with the boys.
Su alfiletero esta para inaugurar aquí el 21 de septiembre : día de la primavera.
Envidia y alegría por usted.Mi viaje soñado es recorrer Irlanda y Escocia.Pero mis pies están donde termina el mapa de América del Sur y me encantaría volver a Machu Pichu no ya de mochilera como lo hice hace 15 años ,sino con mis hijas en avión
1000 cariños. Feliz aventura.!
I love your wrist pincushions. Thanks for the tutorial. I haven’t made one before so i am bookmarking this.
I would love to take a tour around the English Countryside!
Have fun on your trip.
xo jan@sewandsowfarm
Very cute. I like your rounded petals on your wristlet pincushions. This is on my list to make. Thanks! I love to travel … anywhere … anytime. Have a safe and happy trip! … 🙂 Pat
What a sweet little pincushion wristlet! Thanks for sharing your tutorial. I’m looking forward to a trip to Hawaii next month with our entire family!
Love your flower wrist cushion! Thank you for sharing.
Great cushion – thanks for the tutorial too. Thanks for sharing.
Cute pincushion…thanks for the tutorial! Recently returned from a trip to the Pacific NW and enjoyed the beautiful scenery and a visit to the ocean.
Your pincushion is sew cute. Thanks for sharing
Amazing pincushion! Thank you for the tutorial…..Another one for the list of things to make. This hop will keep me busy for the whole winter….
Very cute. I love your wrist flower pinnie.
Looks quite big but you can stick some needles in the petals too. Pretty handy!
This one is a handy one and nice too.
Warm regards from Holland,
Marga♥
Great pincushion. Using it on your wrist is such a creative idea. I would love to visit Hawaii. Thanks for the chance
I wish I could join you- Ireland is on my bucket list. I visited Scotland a few years ago and LOVED it. We flew into Glasgow, then rented a car and drove to Edinburgh, Inverness, Skye, and Oban. The weather cooperated and we had only one day of rain! Enjoy your trip!
Your wrist pincushion is lovely! Great job!
very pretty!!!! I would love to go to Hawaii….such a long flight though
Thank you for the tutorial, I was interested to see how you put the petals together. Thanks for a fun giveaway too, a girl can never have too much fabric. Enjoy your holiday.
Very sweet pin cushion and handy too!! I am looking forward to our trip to Europe next summer to visit our French relatives… woo hoo!!
Last summer, my husband, son & I took a trip to Southern Utah to celebrate son’s college graduation. We hiked in 3 National Parks and saw the most amazing scenery. Plus our son was about to move 900 miles away so it was great to spend time with him.
Cute wristlet pin cushion. I won a trip to Maui back in 2004 – it was wonderful. I’d love to visit New Zealand & Australia. Thanks.
Great idea. Your trip sounds wonderful. I have been on so many wonderful trips throughout my life. The most memorable would be going to the middle east with my great grandmother when I was a teen. I visited Egypt, Syria, Jordan, Lebanon, Israel, Greece, and Italy
Your pin cushion turned out adorable. Enjoy your travels.
A flower pin cool
Such a sweet flower pincushion…too cute! Enjoy your vacation! I’d love to go to Disneyland right now.
Love your first photo!
Cute pincushion! Hope you have a safe trip. I’m SO jealous! My dream trip is to visit and meet my aunts, uncles, and cousins in Northern Ireland. Of course, while I’m over there I would have to see Scotland, Ireland, and England.
What a sweet pincushion – and so practical too.
You will have a great trip. We did Scotland a few years ago and loved it.
Love the wristband pincushion. Very nice. I would love to visit Hawaii.
Very cute! It looks like a giant sunflower in the first photo.
Great pincushion!!! Scotland and Ireland? Oh have a wonderful time!!!!
Very cute and usefull.
Great pictures.
Thanks for sharing the tutorial and the chance to win.
Very cute flower to wear on your wrist! I would love to go to England, Scotland and Ireland.
Very cute wrist cushion. I’ve always wanted to go to Ireland.
Very cute wrist pincushion. Great job. I would like to go to Spain. Thanks for sharing your tutorial.
Gorgeous pincushion. Love the petals. thanks so much for sharing. Ireland and Scotland have long been on my todo list, so please enjoy it for me…
i love the large pin cushion for the wrist. You can put a lot of pins in that one and yet not be in your way. Love the way you made your petals.
I’d love to travel to Norway and Sweden to see where my ancesters lived 🙂 I live your flower bracelet!!
Cute pincushion! I would love to travel through England, Ireland, Scotland and Wales. Thanks for the tutorial and giveaway. Have fun on your trip. vickise at gmail dot com
This is so cute. Thanks for the tutorial. Have a good trip. Some day I would love to go to Switzerland. Have always wanted to visit.
Thank you for the tutorial, you made a wonderful pincushion to have around.
Thanks for the tutorial .i love your wrist pincushion. I would love to go to the grand canyon.
Cute pincushion!
I woul dlove to just go anywhere for a few days! I am caring for my 86 yr old inlaws right now and could use the break! The coast sounds really good!!!!
Thanks for sharing your tutorial on how to make your flower wrist pincushion! I loved going to Lake Louise in Canada!
How pretty! I love how you photographed it, too!
My favorite trip ever was to Paris and London, but going to see my grandkids is the most rewarding!
What a super sweet flower wrist pin cushion! I love to wander through Luxembourg, it’s a sweet little country in Europe and coming from a very flat Holland, I love the mountains and the woods they have. Thanks for sharing!
Ohhh I just love it in your garden! Nothing more practical than a wrist pin cushion!
I wouls LOVE to go to Ireland someday 🙂
I might be only 1/16 Irish but we can trace our line back (on mom’s side) 8 generations (I am the 8th), and my greatx6 grandmother was the Daughter of the mayor of Tippory (spl?) Ireland. Cool huh.
Hi!!! Very pretty wrist pinnie!!!! Thanks for the tutorial!!!
What lovely pincushions with tutorial to go along with them!
Very cute and handy. Comfort for your needles and pins and your arm. Fab Hop. Creative Bliss…
That is a beautiful pin cushion! My dream trip is to go to Europe and visit all of the castles, especially the ones in Scotland.
What a pretty flower and you’ll get lots of use out of that pincushion. I love the idea of a wrist pincushion – I had a blue one years ago.
Thanks for sharing and giving the tutorial of this lovely flower.
Love your wrist pincushion. So adorable!!
This adorable and definitely prettier than the red plastic one! THX for including the how you did it. I don’t have a camera in my cheapie phone so I would eliminate the step of deleting photos. THX for the giveaway opportunity!
Cute flower pin cushion.
Very pretty flower.. Thank you for sharing.
We had a wonderful trip to Alaska and would love to go again. I would also like to visit Switzerland someday. Have a fun trip. Your flower is very cute.
Your pincushion tutorial is appreciated. Have fun on your trip, I would love to go there.
Once took a trip up the coast of California and had a great time.Thanks for the chance to win.
Great pin cushion and great tutorial! Love your flower. Have a great time on your trip. Thanks for sharing!
Very nice pin cushion. Thanks for having a give away and have a great trip.
A cute flower and thanks for the tut.
Very sweet flower and love the idea of a wrist pincushion.
cheers
maggie
maggiemine42@gmail.com
Great pincushion. A wrist one is one I don’t yet have. My favorite trip to visiting the west coast of Norway where my husband’s family lives. Tanks!
I’ve wanted to make a wrist pincushion for some time, thanks for the tutorial. I want to make a trip to Hawaii sometime.
The trip I would love to take is a cruise to Alaska. Love your flower.
What a precious pincushion! My favorite trip was to Aruba about 7 years ago.
Lovely wrist cushion. It reminded me of a wrist corsage. My trip of a lifetime was 3 months of camping in the Yukon and Alaska last summer. Awesome scenery, fantastic wildlife, gorgeous flowers and friendly people. It is definitely a trip I will take again and next time it will be longer. Thank you for sharing and offering a giveaway.
This is a very creative and useful pin cushion. The flower is lovely on your wrist. I too, love my old red plastic wrist pin cushion. You are right, though, it’s not very stylish. I would love to travel to the UK and meet some of the wonderful blogging friends I have made.
Thanks for the tutorial – very practical pincushion!
Cute pincushion! I would love to go to Ireland & Scotland. Have a wonderful trip.
Thank you very much for the tutorial, love this flower and I never have enough pincushions! 😀
Lovely pincushion! I’d like to go to Europe.
I always love going to the Upper Peninsula in Michigan. Some day I would love to go to Alaska, Australia and Austria (interesting–they all begin with A). There are lots of places I would love to visit.
I have been to Ireland but not Scotland. I envy you! Thanks for the instructions on the wrist pincushion. I love that it is bigger and you shouldn’t miss it while you are sewing and removing pins at the same time!
Quite a few years ago we went to Yellowstone in Wyoming, loved it.
smjohns63 at yahoo dot com
Love your pincushion and I think the wrist strap with Velcro is GENIUS! I usually use elastic the get annoyed when it stretches out and flops around on my wrist.
I always miss and stab myself when I use those. But yours is beautiful.
love your pincushion
Your pincushion is not only adorable but looks like something I can make too. Thanks for the photo tutorial. I just moved and for the life of me, I can9locate my pincushions so I like that I can whip one up soon!